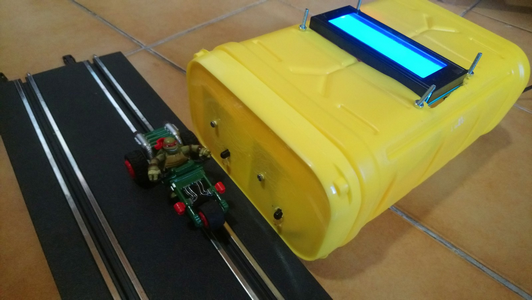
We always ask ourselves the question “What is the fastest car?”. Sometimes the difference is so big that the answer is easy. But sometimes, it is not easy. We can also ask ourselves the following question: “Who is the fastest driver?” with the same car. I had made an electronic assembly controlled by a Rasberry Pi but it was not easy to install, finally it took a few minutes. I wanted to make a faster, more flexible and not too expensive system. I chose an Arduino Nano with which I had already made some assemblies.
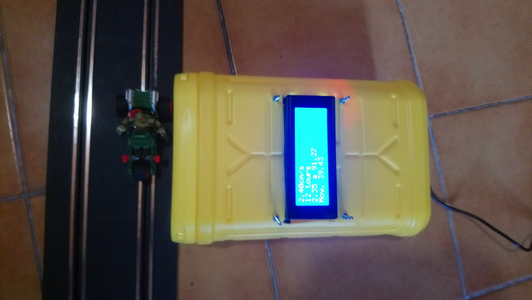
Material :
- 1 arduino Nano (3€)
- 1 arduino nano support (2€)
- 1 9V power supply (2€)
- 2 infrared proximity sensors (3€ for 10)
- 1 LCD screen (3.5€)
- 3 sets of 4 Dupont wires (1€)
Principle:
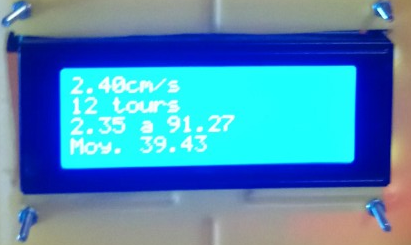
Two proximity sensors detect the car, the Arduino informed of the passage of the car, notes the time of passage with a precision of the microsecond. Then the micro controller calculates the difference between the two times, which gives the duration. Knowing the distance between the 2 sensors, it calculates the speed. Then the information is sent to the LCD screen. As the display is large, we calculate and display the number of revolutions (or measurements), the minimum, the maximum and the average of the values.
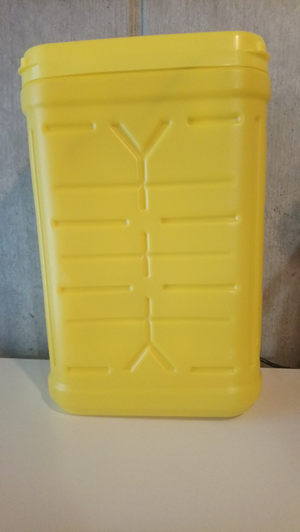
So that all the elements do not move around, I put everything in a box. The morning breakfast was very useful in my research. This yellow box is the ideal element with its cover and its size.
The cover allows to fix the sensors, and can be easily removed. The side of the box will accommodate the display. The bottom of the box will be pierced to let the power cord pass through.
At this stage, visually, the fault that I find is this solid yellow color, I will have to find stickers to personalize this radar.
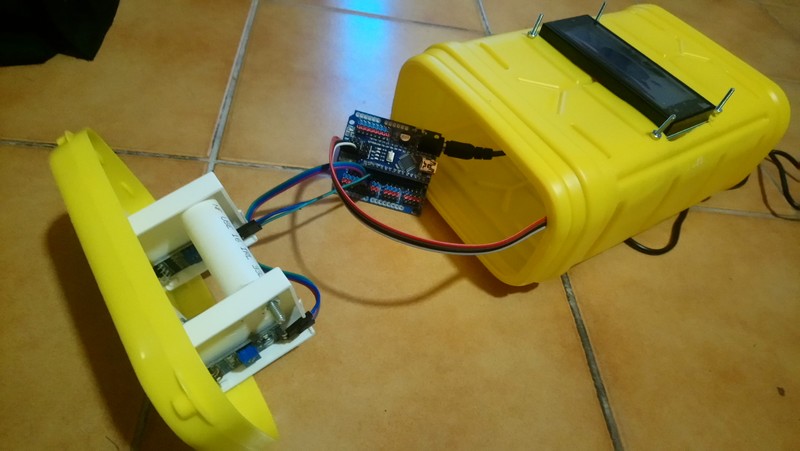
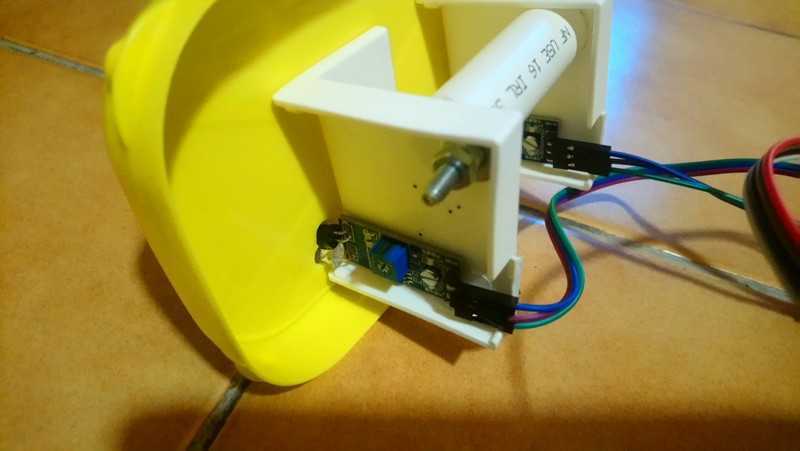
Inside, we see that it is simple, there are just a few wires between each element. Below, we see the 2 sensors fixed on plastic corners.
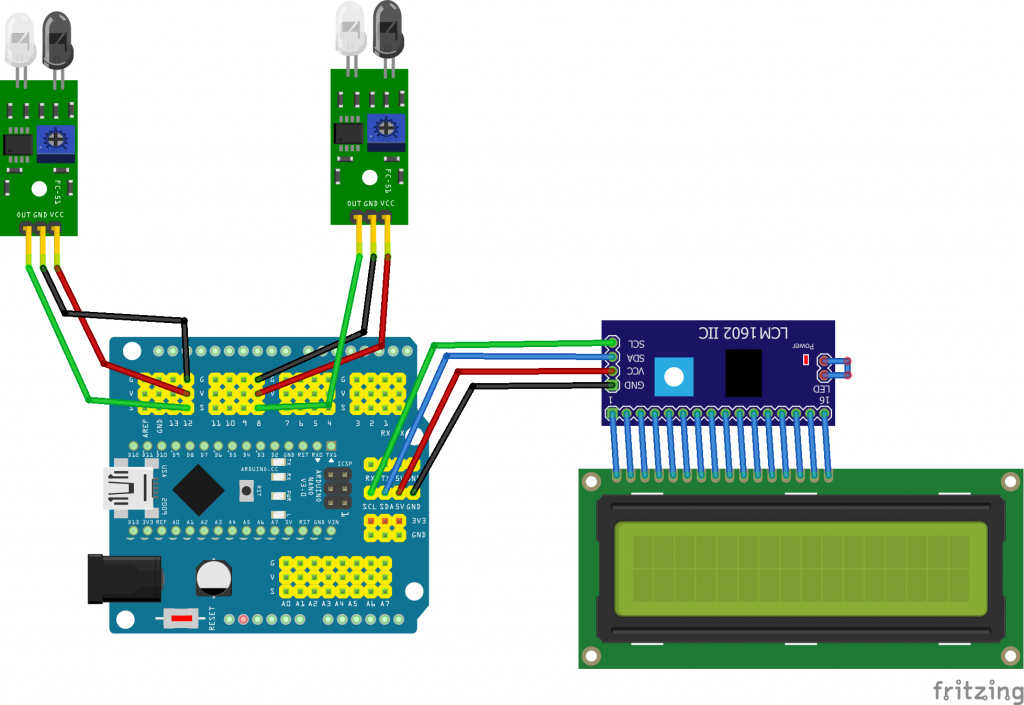
Here is the assembly plan of the elements, note that you have to pay attention to the pin numbers of the sensors. You have to be consistent with those indicated in the program.
Here is the program for the Arduino.
//Libraries
#include <Wire.h>
#include <LiquidCrystal_I2C.h>

LiquidCrystal_I2C lcd(0x27, 2, 1, 0, 4, 5, 6, 7, 3, POSITIVE);  // Set the LCD I2C address, if it's not working try 0x27.

const int sensorPin = A0;
int outputValue = 0;
const int IR1 = 4;
const int IR2 = 5;

int compteur1 = 1;      // variable enregistre un passage compteur 1
int compteur2 = 1;      // variable enregistre un passage compteur 2
long temps1=millis();    // Variable prise de temps pour IR 1
long temps2=millis();    // Variable prise de temps pour IR 2
long temps3 = 0;         // Variable pour le calcul du temps reel passe
float V = 0.0;            // Variable Vitesse
float TTS = 0.0;          // Variable temps passe en secondes
float VKM = 0.0;          // Variable vitesse en KM/H
float VKMN = 0.0;         // Variable vitesse en N
float VKMH0 = 0.0;        // Variable vitesse en H0

float V_min = 99999999;        // Vitesse min
float V_max = 0.0;        // Vitesse max
float V_moy = 0.0;        // Vitesse moy
float V_som = 0.0;        // Vitesse som

String texte="";
int tours=0;

void setup(){
  lcd.begin(20,4);   // iInit the LCD for 16 chars 2 lines
  lcd.backlight();   // Turn on the backligt (try lcd.noBaklight() to turn it off)
  lcd.setCursor(0,0); //First line
  lcd.print("*** attente  ***");
  lcd.setCursor(0,1); //Second line
  lcd.print("*** vehicule ***");
  lcd.setCursor(0,2); //3eme line
  lcd.print("***   SLOT   ***");
  lcd.setCursor(0,3); //4eme line
  lcd.print("***  RACING  ***");
  // capteurs
  pinMode(IR1,INPUT);
  pinMode(IR2,INPUT);
  //Serial.begin(9600);
}

void loop(){

  int valIR1 = digitalRead(IR1);
  // Lecture de broche A2 et mise du resultat dans la variable valIR1
  int valIR2 = digitalRead(IR2);
  // Lecture de broche A3 et mise du resultat dans la variable valIR2

   if(valIR1 == LOW && compteur1 == 1 && compteur2 == 1) {
   // Si passage devant IR1 ET compteur1 = 1 alors ....
   temps1=micros();       // enregistrement dans temps1 de la valeur millis
   compteur1 = compteur1 + 1;
  // On rajoute +1 a compteur1 ce qui empeche le remplacement de la valeur de temps1
  //Serial.print(temps1);
  //Serial.println();
   }

   if(valIR2 == LOW && compteur2 == 1 && compteur1 == 2) {
   // Si passage devant IR2 ET compteur2 = 1 alors ....
   temps2=micros();      // enregistrement dans temps1 de la valeur millis
   compteur2 = compteur2 + 1;
  // On rajoute +1 a compteur2 ce qui empeche le remplacement de la valeur de temps2
  //Serial.print(temps2);
  //Serial.println();
   }

   if(compteur1 > 1 && compteur2 > 1) {
       // Si les valeurs de Compteur1 ET de compteur2 sont differente de 1 alors le calcul peut debuter
      tours=tours+1;
       temps3 = (temps2 - temps1);
       // temps en millisecondes passez entre les deux capteurs
  //Serial.print(temps3);
  //Serial.println();
  //Serial.print("----");
  //Serial.println();


       TTS = ((float)temps3 / 1000000.0);
       // conversion milisecondes en secondes

       V = (0.05 / (float)TTS)*100;
       // calcul de d/t, ma distance est ici de 5 cm, soit 0,05 m
       // en cm/s
      V_som =V_som+V;
      V_moy=V_som/tours;
      if(V < V_min) {
        V_min=V;
      }
      if(V > V_max) {
        V_max=V;
      }
      //texte=String(V)+"cm/s -"+String(tours)+"    ";
      affichage(String(V),String(tours),String(V_min),String(V_max),String(V_moy));
      delay(500);  // delais de 10 secondes avant reprise du programme
        // Pour permettre la liberation de la zone IR

        compteur1=1;  // Variable remise a 1
        compteur2=1;  // Variable remise a 1
        temps1 = 0;   // Variable remise a 0
        temps2= 0;    // Variable remise a 0
   }

  //delay(10);

}

void  affichage(String vitesse,String tours,String V_min, String V_max ,String V_moy) {

  lcd.backlight();
  //lcd.noBacklight();

  lcd.clear();
  lcd.setCursor(0,0); //First line
  lcd.print(vitesse+"cm/s");
  lcd.setCursor(0,1); //Second line
  lcd.print(tours+" tours");
  lcd.setCursor(0,2); //3eme line
  lcd.print(V_min+" a "+V_max);
  lcd.setCursor(0,3); //4eme line
  lcd.print("Moy. "+V_moy);

}
If you want more information on the implementation to send the program to the Arduino, you can consult the following article: https://www.framboise314.fr/commencer-avec-larduino/
So there you have it, you have a radar that you just have to place on the edge of the track and then connect to the mains. It is also possible to use a 9V battery and a small adapter to power the Arduino, but the autonomy will not be very long.